Flat, thin and crispy chocolate chip cookies
Bakery Best-Seller Chocolate Chip Cookie Recipe

These Crispy Flat Chocolate Chip Cookies are proof-tested because I sold loads of them when I ran my small home bakery. It was especially popular for companies' events and conference catering orders, where people could walk around, mingle with each other, and snack on the huge cookie!
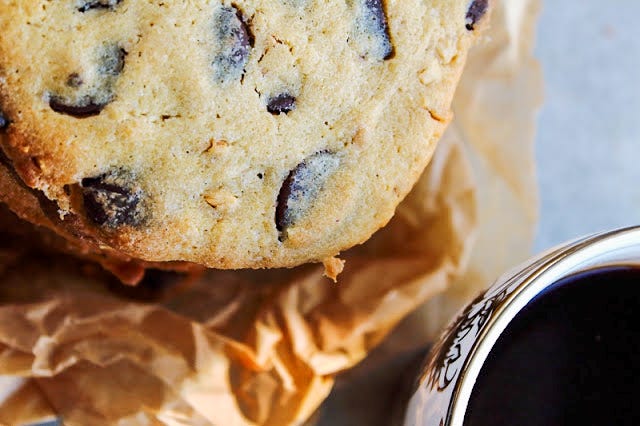
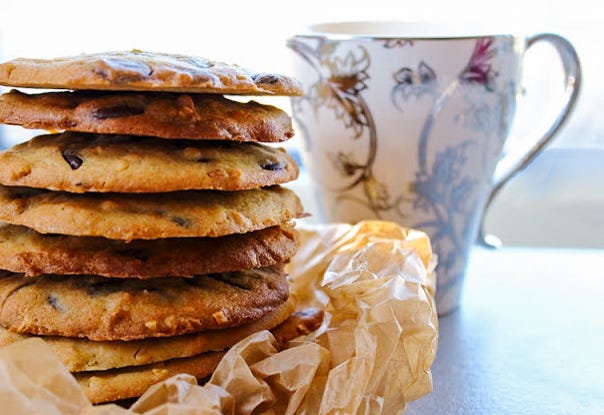
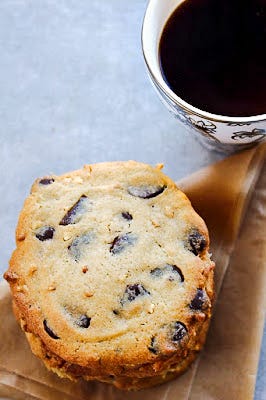
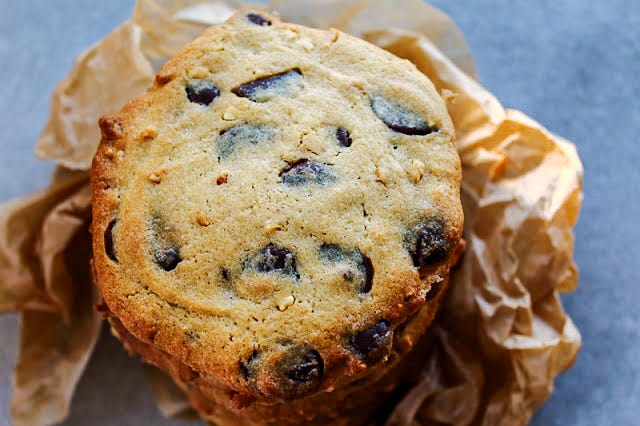
As opposed to the more common dense and soft chocolate chip cookies, these are large as plates and thickly filled with chocolate chips. They are the best friends of a good, strong coffee. There is plenty of room to play with them: classic, dark (that is, with added cocoa), with caramel, with nuts, made from various whole grain flours, and of course, gluten-free versions, etc. It is a very good idea to use, for example, raw chocolate nibs from an organic store. This time, I stuck to the dark buttons and used regular plain white wheat flour. Both organic, though. You can also vary the techniques, making them crumblier, thicker, or crispier. This recipe allows them to become quite crispy and not very dense, but big and wide. Be sure to use dark chocolate for the right result!
And one more good piece of news: the cookies can be stored beautifully in a bag or box in the refrigerator for up to two weeks!
As seen in the photos and the headline, this is the wide, crispy, flat Chocolate Chip Cookie recipe. I promise, I will come up with the best plump and chewy Chocolate Chip Cookie recipe as well someday, but meanwhile, you can check out my Cinnamon Oatmeal Cookie recipe if chubby little bumps are the cookies that you crave right now: Oatmeal Cookies (egg-free). The main difference between flat/crunchy and risen/soft chocolate chip cookie recipes is on the technical side, such as chilling the dough, shaping the cookies on the sheet, etc.
Another reason the cookies will not turn out very puffy and high (which was trendy for a while by all chocolate chip cookie recipes, making them quite similar) is that I use a smaller amount of baking powder.
The Flour Power: All-Purpose vs. Bread Flour
Flour is the backbone of your cookie. For crispy flat chocolate chip cookies, all-purpose flour is the go-to choice. It contains a moderate amount of protein, which helps create a tender structure. Bread flour, on the other hand, has a higher protein content. This could give your cookies a chewier texture but may also make them denser.
Butter: The Foundation of Flavor and Texture
Butter plays a critical role in flavor and texture. Using unsalted butter allows you to control the saltiness in your cookies.
Sugar Showdown: Brown vs. White Sugar
Sugar not only sweetens but also affects texture. Brown sugar, which contains molasses, retains moisture better, resulting in chewy cookies. White sugar, on the other hand, can help achieve a crisper cookie. A mix of both sugars can create an ideal balance, giving you the best of both worlds.
The Creaming Method: Incorporating Air for Texture
The creaming method involves mixing butter and sugar until light and fluffy. This process incorporates air, which helps your cookies rise and become tender. Aim for a pale color and fluffy texture, which typically takes about 2-3 minutes.
Baking Time: Signs of Doneness and Avoiding Overbaking
Typically, cookies bake for approximately 10 minutes. Look for golden edges and slightly soft centers. They will continue to bake on the tray after removing from the oven, so don’t wait until they’re rock hard!
Beyond Chocolate Chips: Nuts, Spices, and Dried Fruits
Consider adding nuts like walnuts or pecans for crunch. Spices such as cinnamon could elevate the flavor. Dried fruits like cranberries or cherries can also add a delightful twist. Or add espresso powder for a coffee kick! The possibilities are endless, but stick to the main recipe regarding the base ingredients, cooking time, and temperature.
Make sure not to leave out crushed peanuts in these cookies, they elevate the flavor immensely! Of course, if you don't have any nut allergies. But if you do, use sunflower seeds. I used peanuts because they go perfectly with the salty-sweet chocolate cookie.
FLAT, THIN, AND CRISPY CHOCOLATE CHIP COOKIES
Not plump and gooey this time!
Prep Time: 15 mins
Cook Time: 8 mins
Rest time: 7 mins
Total Time: 30 mins
Yield: about 15 large cookies
Category: Dessert
Method: Baking
Cuisine: American
INGREDIENTS
Wet Ingredients
160 g butter (let it first soften at room temperature)
70 g light soft Muscovado sugar
60 g regular white caster sugar (Organic if available)
2 teaspoons vanilla sugar or natural vanilla extract
2 medium eggs
Dry Ingredients
250 g all-purpose wheat flour (sifted)
0,75 teaspoons baking powder
1 pinch salt (be sure not to leave it out, as it adds significantly to the taste)
200 g dark chocolate buttons, nibs, or chopped pieces
4 tablespoons roughly crushed peanuts (chop with a knife or pulse a few times in a food processor)
INSTRUCTIONS
Preparing the sheets
Cover 2 similar baking sheets with baking paper.
Creaming the wet ingredients
Beat the sugars and butter together until creamy. It's best to use a wooden spoon. Add the vanilla and egg, and mix until smooth.
Preparing the dry ingredients
Combine the baking powder with the flour and sift it into the dough. Sprinkle with salt and mix well. Also add the chocolate pieces and nut crumbs, mixing again to ensure they are evenly distributed in the dough.
Preparing the oven and shaping the cookies
Preheat the oven to 175 degrees and start placing the cookies on the plates. One heaping tablespoon is about the right amount for one cookie, yielding approximately 15 cookies. Start by putting 7-8 cookies on one sheet, then flatten them with a spoon. 8 Finally, smooth the edges with your fingers to be somewhat round.
When one sheet is full, you can place it in the oven to bake while preparing the second, as it takes about the same time to prepare. Again: put 7-8 cookies on the second sheet, then flatten them with a spoon. Don't overcrowd the sheet, because the cookies will expand!
The cookies are ready when they are golden on top and start to turn light brown at the edges. They will keep "baking" from the inside, even after being taken out, so let them be just slightly too raw.
Cooling and eating
Place them on a wire rack to cool. These cookies are best when completely cooled, as this allows a nice crispness to develop.